This is a fun, inexpensive craft for any occasion. I think this would make a very cute wedding favor or a birthday gift for guests.
My son and I made these for his class for Valentines Day in lieu of candy. The teacher was very much appreciative that we did this. My son was so proud that he was able to actually do most of the work for this craft. I printed out a sheet of paper on the computer with the words “Love Is Tweet” and my son cut them into strips and wrote his classmates names on the back of them to make them more personalized. After they had dried, we taped them around the hemp rope we used to hang them. We ended up making 25 of these bad-boys.
The uses for this craft are endless! You don’t have to be limited to the heart shape. Think about a cute four-leaf clover for St. Patrick’s Day, or a bunny for Easter, or a cute Christmas Tree for an easy Christmas gift. You get the point 😉
What you’ll need:
- 2 Packets {envelopes} Knox Original Unflavored Gelatin {typically, 4 envelops come in a box}
- 2/3 Cup Water
- 2 Cups of Wild Bird Seed
- Heart shaped cookie cutters or silicone pan
- Rope (I used natural Hemp rope)
- Wax paper
- Cookie sheet
- Straws (optional)
- Tags (optional)
Will make 5-6 bird feeders depending on your size of cookie cutters.
How to do it:
If you choose to do this project with adding the rope as you make it, you will want to prepare your rope first. I used natural hemp rope that I bought at Walmart. Measure how long you would want your bird feeder to hang, I just eye-balled it. Make sure it’s a bit longer to allow for hanging on bigger branches. It’s your choice. Loop it and tie a knot at the bottom. Make as many as you need. Again, the above recipe will make 5-6 bird feeders depending on your size of cookie cutters. Set aside.
OR – If you chose to add your rope after, cut some plastic straws to be placed through the bird seed before it dries, thus creating a hole to loop your string or ribbon through later.
In a large saucepan bring your 2/3 cup of water to a low boil. Right when it starts to boil turn the heat down and empty your 2 envelopes of gelatin into the water while stirring it until gelatin is dissolved and starts to thicken a bit. Continue to stir.

Once your gelatin is starting to thicken a bit, turn the heat completely off and remove the pan from the heat. Pour in your bird seed and stir until well coated.
Keep stirring!

There shouldn’t be a lot of liquid on the bottom of the pan, if you ended up with a lot of liquid left over, add a tablespoon of bird seed at a time, stirring until most of the liquid is gone.
TIP: Don’t add too much bird seed to the point of it not being evenly coated, it will not stick together well.
Once your bird seed is well coated and stirred set it aside and get your cookie cutters or silicone pan ready.
If you are using cookie cutters place a sheet of wax paper down on top of a cookie sheet and lay out your cookie cutters on top.

As you can see in the picture above, I used all different sizes of cookie cutters because that’s what I had. I also used a silicon pan that had some heart shapes on it.
Scoop a spoonful or two of the bird seed mixture into the bottoms of the cookie cutters {or silicon pan} pressing down and around to make it even and into the heart shape. Once you have a good base layer, take your rope and place it in the cookie cutter making it centered with the top of the heart. Or if you chose to use the straw method, skip this step.

I straightened the rope out a bit more on the above picture.
Once you placed the rope where you want it, fill the remaining heart with more bird seed. Once filled, get a piece of wax paper and press down lightly.
TIP: If you have chosen to use the straw method, you will want to press your straw into the top of the heart shape, or wherever you want it to hang from, after you have lightly pressed the bird seed down. Leave the straw in until the bird seed firms up a bit, remove and it will have left a hole for you to string it up. I didn’t use the straw method here. It’s your choice!

Once you have pressed down lightly you are done and need to allow the bird feeders to firm up and dry a bit.

After about 30-45 minutes, I carefully pressed out the feeders. They were still a bit “wiggly” but held together. If you are trying to press out your bird feeders and it is still wet, leave them. In fact, flip them over and let the bottom side dry for a bit longer.
The key to these bird-feeders is to allow them to dry completely. We made them a few days before we needed them to make sure they were dried completely. I suggest, if you have some room, that you hang them to dry. This is the best way for them to set up and be ready to use or package up for your event.
I hung them for a few days up and away from any lurking birds. Since we were making enough for a class, I hung the ones I already finished outside where I could watch them while I worked on more. Once I finished all of them, I moved them all inside to finish drying.


Right before we were ready to hand them out, we printed up our tags and folded them around the rope and taped them. A cute added gesture. My son was happy to write this classmates names on the tags.

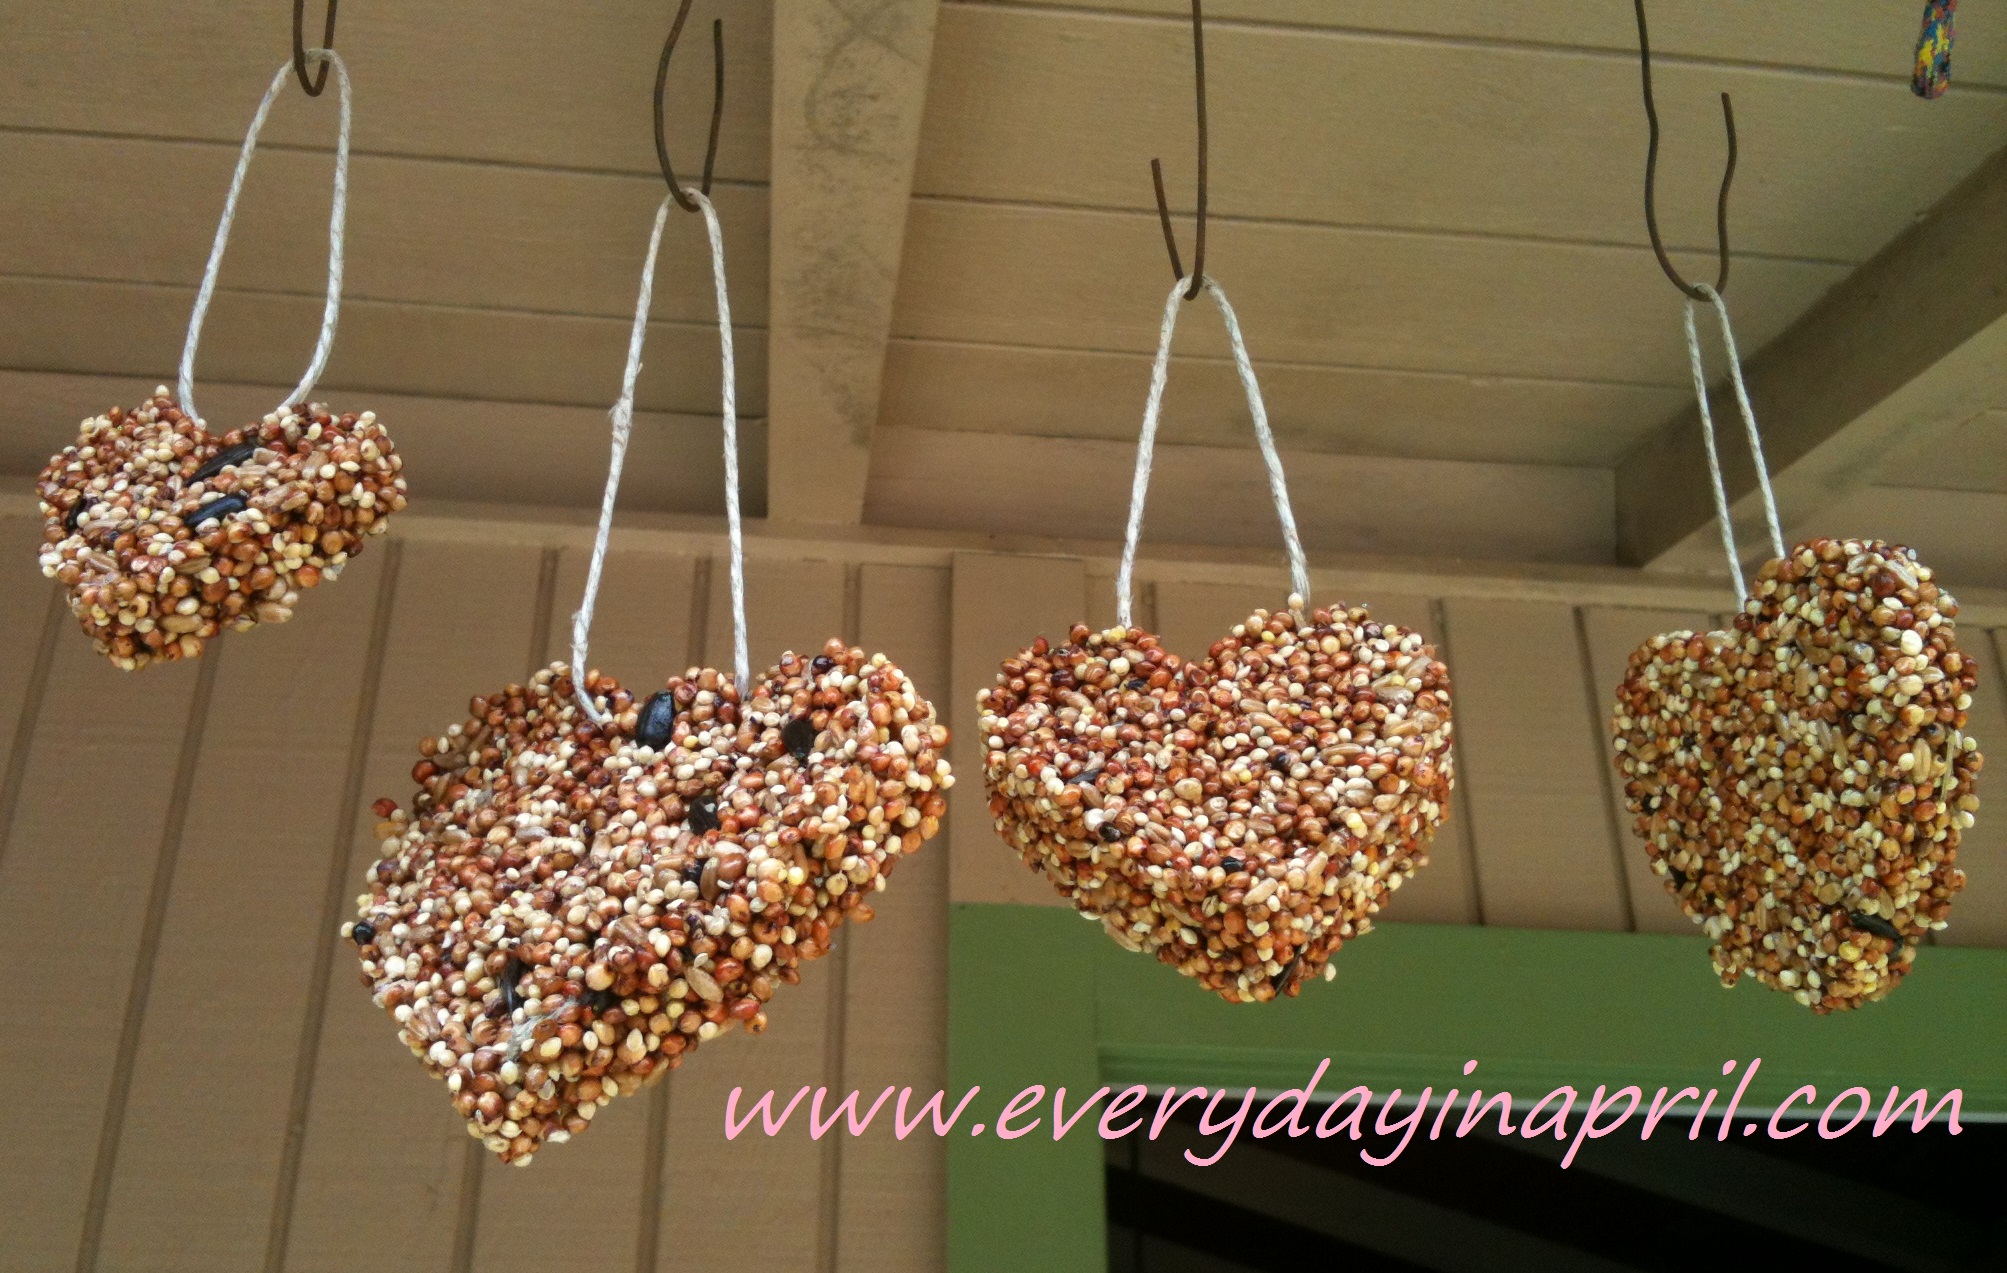
With all the excitement I didn’t get a chance to snap a photo of our completely finished bird feeders with their cute “Love is tweet” tag on them. But they did look something like this:

If you were making this for a special event such as a wedding, you could place them in cute bags wrapped with colored ribbon. It’s a fun way to think out-side the box and give back to nature. I even went out and grabbed the hemp strings after the birds ate the seed and I plan on re-using them for future bird-feeders.
Enjoy and have fun with your kids!


One Response to “Love is Tweet”